Android多渠道打包
- Gradle方式
- Python脚本方式
通过Gradle多渠道打包
配置步骤
1. 在AndroidManifest.xml 配置占位符
|
|
2. 在app的build.gradle文件中配置签名
|
|
3. 在app的build.gradle文件中配置build类型
|
|
4. 在app的build.gradle文件中配置渠道包名以及输出的文件名
|
|
5. 打包
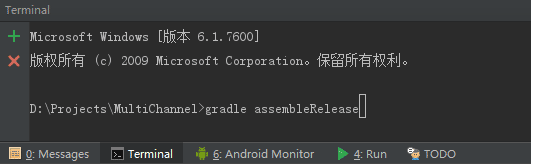
通过AndroidStudio的Terminal或者Gradle环境进行打包
Terminal打包时使用gradle的如下命令即可批量打包
gradle assembleRelease
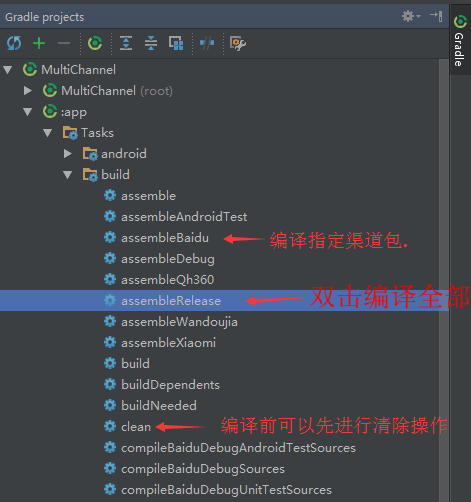
Gradle工具一键打包.
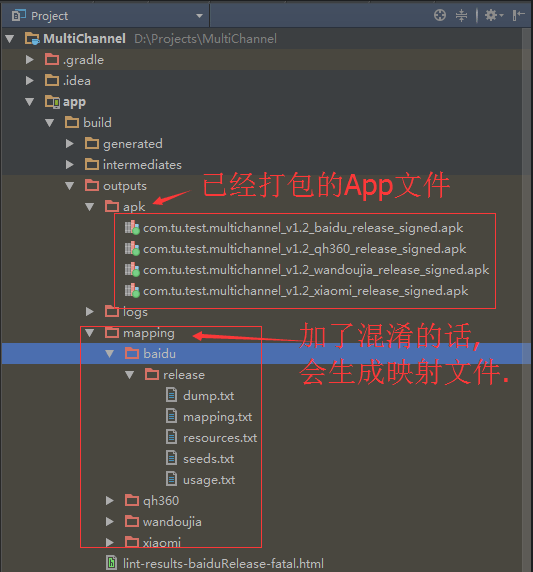
打包出来的的各大渠道包
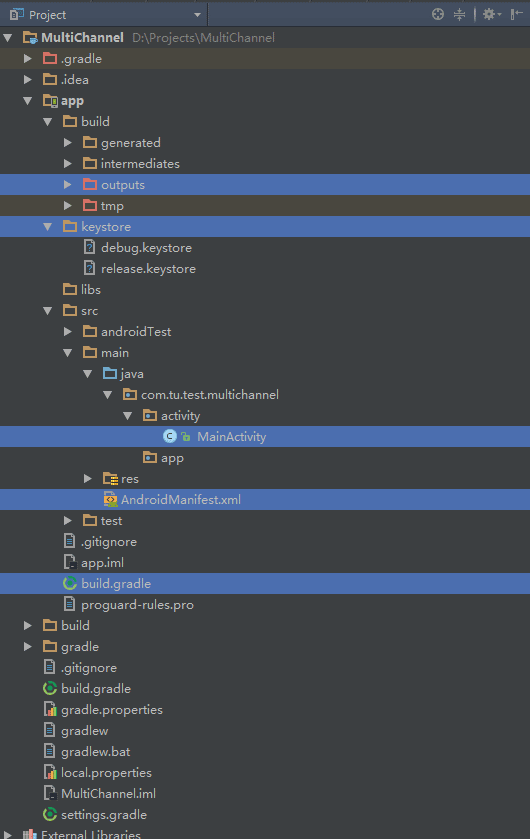
配置的完整文件
AndroidManifest.xml配置
|
|
app/build.gradle配置
|
|
注意项
build.gradle的配置项是分先后顺序的,如果调用某个配置,必须在调用前进行声明.否则抛无法获取属性.
Error:(29, 1) A problem occurred evaluating project ‘:app’.
Could not get unknown property ‘releasekey’ for SigningConfig container.
通过Python批量打包
- 这个方案没法解决不同渠道使用渠道自己SDK的问题,友盟的SDK提供了在代码中设置渠道的方式,所以再获取到渠道号后再调用SDK相关设置渠道的方法就可以了
- apk用的是java那一套签名,放在META-INF文件夹里的文件原则上是不参与签名的。如果Google修改了apk的签名规则,这一套可能就不适用了。
1.安装Python环境
本人下载的python-2.7.12.msi
下载地址:https://www.python.org/downloads/
2.在项目中增加获取渠道的方法
在项目中增加ChannelUtil.java在Demo文件中可以找到.并通过如下代码获取渠道
String channel = ChannelUtil.getChannel(this);//调用方法
3.为app打签名包.
为App打的签名包放到Python脚本文件的同目录.
4.配置需要的渠道
channel.txt 里面的就是渠道,一个渠道一行.
5.运行Python脚本
双击MultiChannelBuildTool.py文件运行脚本
6.关键实现代码
Java代码
Python代码
|
|